Every website needs occasional updates to stay current with modern web standards and user expectations. In this article, I’ll share my journey of rebuilding my personal website using Hugo, explaining the challenges I faced and the solutions I implemented.
Why I Decided to Build a New Website
When I started this project, my old website had several issues that made it frustrating to use and maintain. It was functional, but the overall experience-both for visitors and for me as the owner-was lacking. Here are the main reasons why I decided to rebuild everything from scratch:
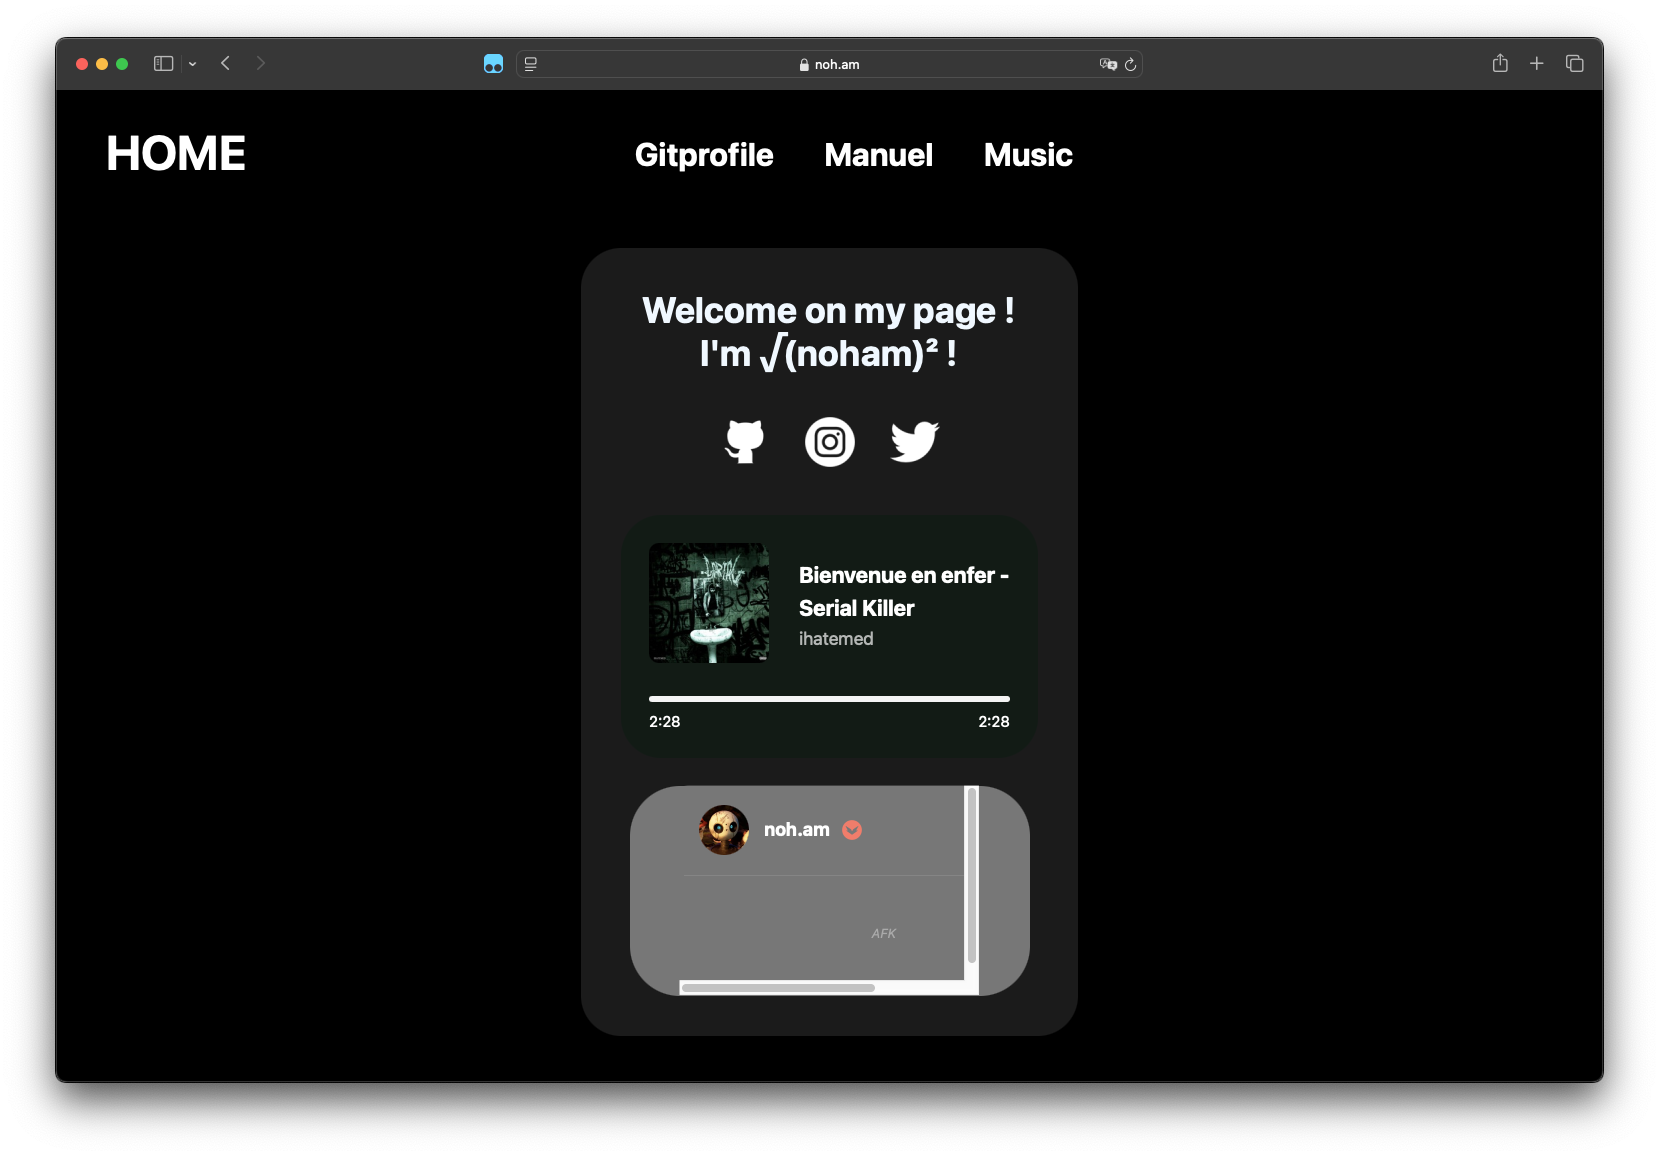
The Desktop View Wasn’t Great
The old desktop version of my website had a clunky and outdated layout. The design was neither modern nor visually appealing. There were alignment issues and elements that didn’t adapt well to different screen resolutions. Maintaining consistency across different browsers was also a headache (hello Safari..).
Screenshot of the old website's desktop interface showing alignment issues The Mobile View Was Unusable
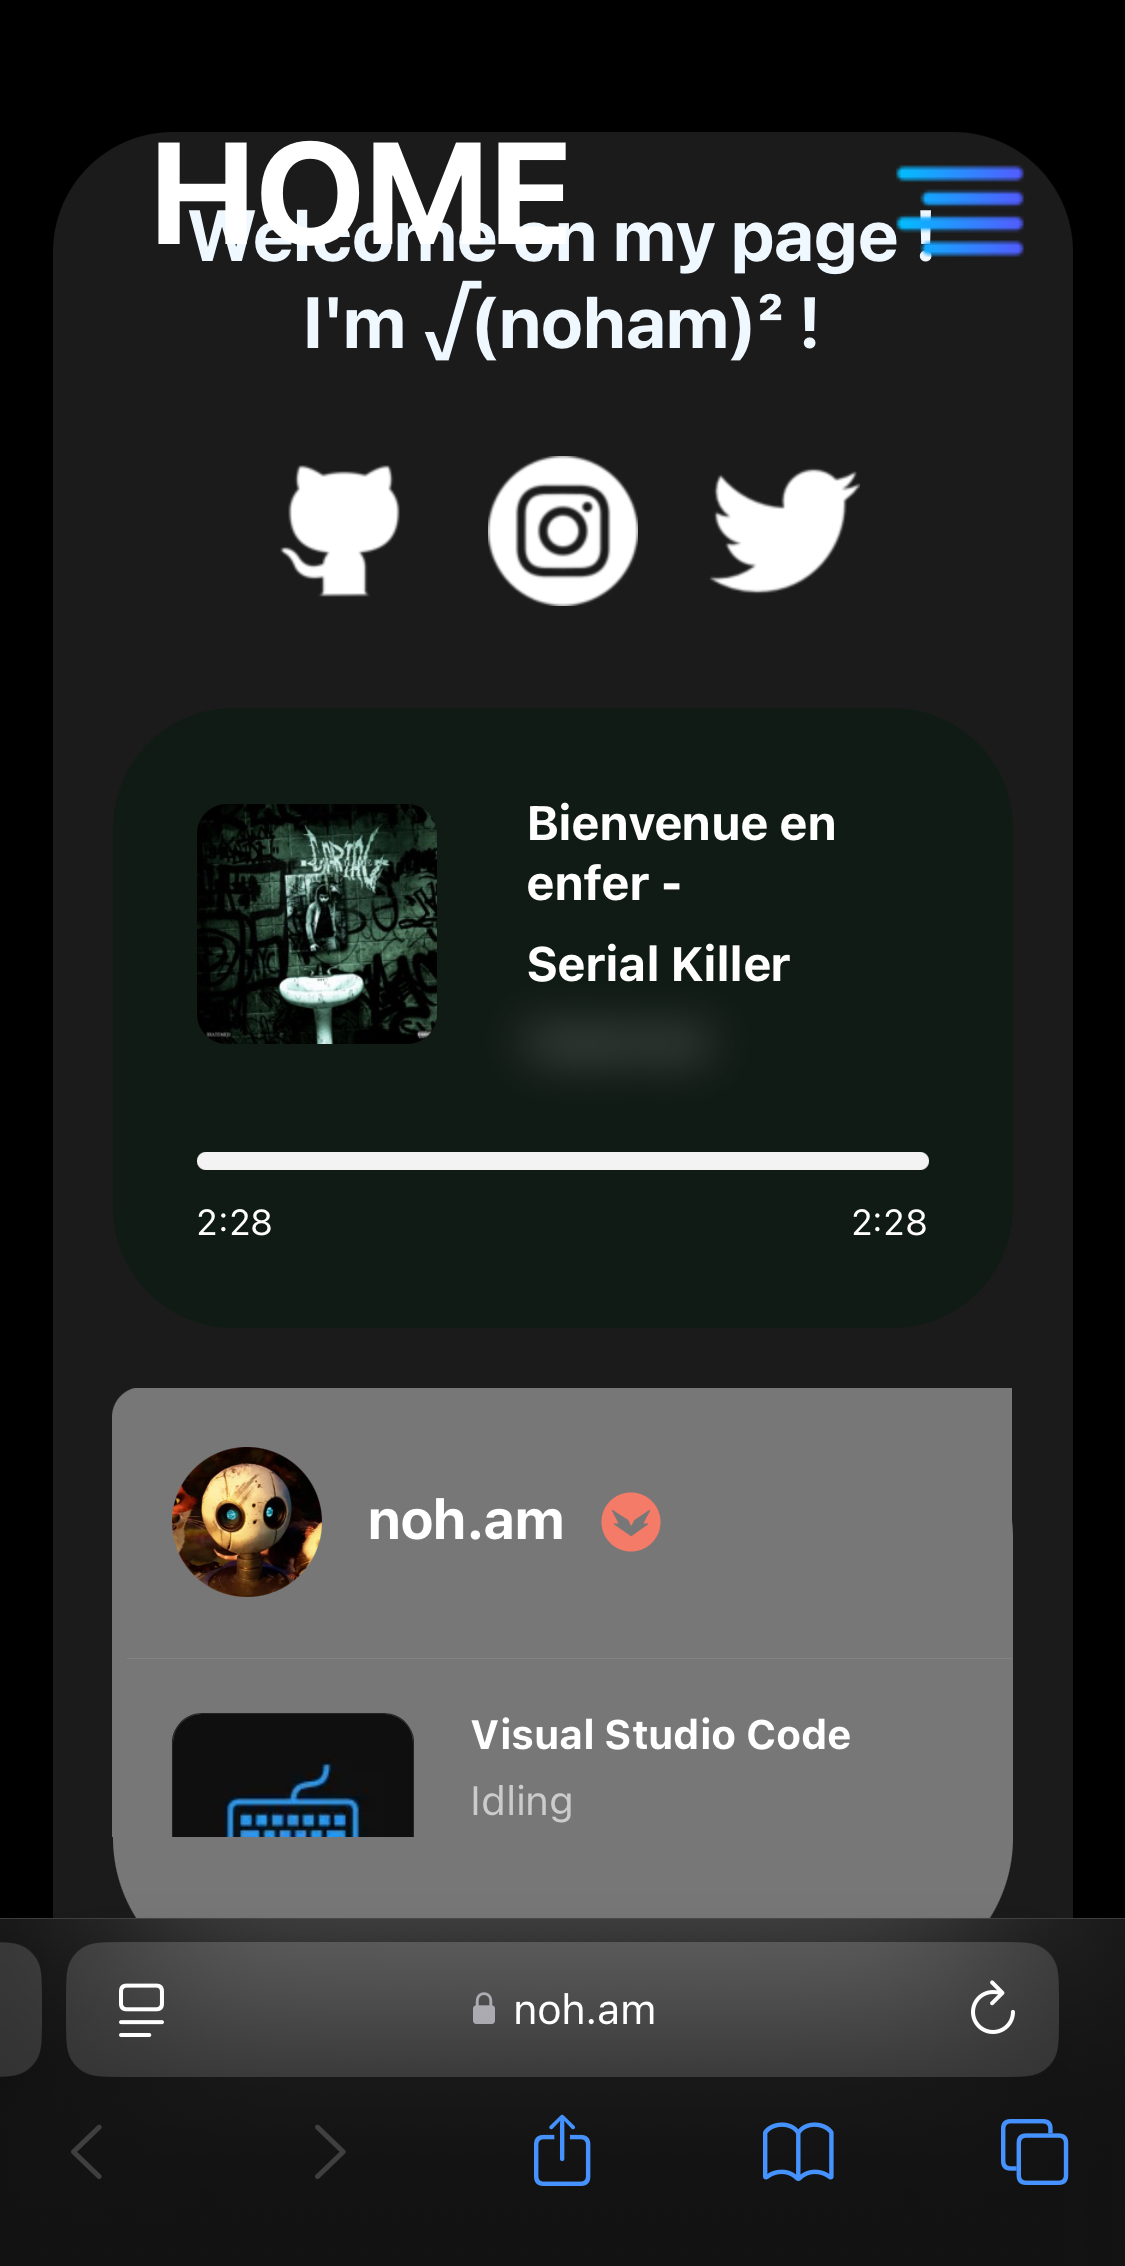
The mobile version was even worse. Navigation was frustrating, text elements passed on top of each other, and some buttons were almost impossible to click. The website wasn’t fully responsive, meaning it didn’t adjust properly to different screen sizes.
Screenshot showing the poor mobile responsiveness of the old website I Wanted the Ability to Write and Publish Articles Easily
One of my biggest frustrations was how difficult it was to update content. Every time I wanted to post a new article or update existing content, I had to dive into CSS and manually adjust the formatting. This was time-consuming and completely unnecessary. I wanted a system that would allow me to focus on writing content rather than dealing with design and layout problems.
Choosing Hugo as the Solution
After researching different options, I decided to use Hugo as the foundation for my new website.
Hugo is a fast and flexible static site generator that allows you to create websites using simple Markdown files. Instead of relying on a complex database-driven CMS like WordPress, Hugo generates static HTML files that can be served quickly and efficiently.
Adding a Theme
One of the advantages of Hugo is its theme system, which makes it easy to get a well-designed website up and running quickly. I explored several options before making my final choice:
Choosing PaperMod
I ultimately chose PaperMod because:
- It had the most GitHub stars (>10k), meaning better community support
- It had a clean, minimalistic design that fit my needs
- It offered features like dark mode, better typography, and a user-friendly layout
I installed PaperMod and started customizing it to fit my preferences.
Adding Modules
To enhance the functionality of my website, I added a few Hugo modules that provided useful features.
Adding Comments with Giscus
Instead of using traditional commenting systems, I opted for Giscus, which is based on GitHub Discussions. It allows users to comment using their GitHub accounts, which I find convenient.
Installation steps based on Hugomods’s documentation:
- Add the Giscus module to Hugo in the
config.tomlfile:
module:
  imports:
    - path: github.com/hugomods/giscus
- Configure the
config.tomlfile with GitHub repository information. Follow configurations steps: https://giscus.app/ to getrepo_idandcategory_id
params:
  giscus:
    endpoint: 'https://giscus.app/' # Client script endpoint.
    repo: 'NohamR/giscus' # The GitHub repository, required.
    repo_id: 'R_kgDON8Oi3w' # search for octolytics-dimension-repository_id in the page source of the repository.
    category_id: 'DIC_kwDON8Oi384CnHVL'
    mapping: 'pathname'
    strict_matching: true
    theme: 'transparent_dark'
    input_position: 'top' # top: above the comments. / bottom: below the comments.
    reactions: true # Enable reactions for the main post.
    lazy_loading: true # Load the comments lazily.
    languages_mapping:
      en-us: 'en'
- Add Giscus template:
Create a file named
comments.htmlinlayouts/partials:
<!-- Add Giscus comments -->
<h2>{{ i18n "comments_title" | default "Comments" }}</h2>
<hr />
<div class="giscus"></div>
<hr />
{{ partial "giscus/script" . }}
<!-- End of Giscus comments -->
- Add Giscus JavaScript:
Create a file
extend_head.htmlinlayouts/partials:
{{- /* Head custom content area start */ -}}
{{- /*     Insert any custom code (web-analytics, resources, etc.) - it will appear in the <head></head> section of every page. */ -}}
<!-- Add Giscus comments -->
{{- $opts := dict
    "params" (dict "endpoint" .Site.Params.giscus.endpoint)
  -}}
  {{- $js := resources.Get "js/giscus.ts" }}
  {{- $js = $js | js.Build $opts }}
<script src="{{ $js.RelPermalink }}"></script>
<!-- End of Giscus comments -->
{{- /* Head custom content area end */ -}}
- Add Giscus JavaScript:
Create a file
giscus.tsinassets/js
'use strict'

import { default as params } from '@params';
import Giscus from 'mods/giscus/js';

const giscus = new Giscus(params.endpoint);
window.Giscus = giscus;
Image Handling with Hugo Mods Images
Managing images manually was tedious, so I added the Hugo Mods Images module to automate optimizations like resizing and lazy loading.
Installation steps based on Hugomods’s documentation:
- Add the module in the
config.tomlfile:
module:
  imports:
    - path: github.com/hugomods/images
- Configure WebP support:
params:
  hugomods:
    images:
      modern_format: 'webp'
Analytics with Umami
Instead of using Google Analytics, I chose to self-host Umami Analytics, a privacy-focused alternative.
Installation steps based on Hugomods’s documentation:
- Add the module in the
config.tomlfile:
module:
  imports:
    - path: github.com/hugomods/umami-analytics
- Add your Umami script URL and website ID in
config.toml:
params:
  umami:
    script_url: 'https://stats.noh.am/script.js' # URL to your Umami script
    website_id: '11111111-2222-3333-4444-555555555555' # Your website ID
- Add Umami JavaScript:
Create a file
extend_head.htmlinlayouts/partials:
{{- /* Head custom content area start */ -}}
{{- /*     Insert any custom code (web-analytics, resources, etc.) - it will appear in the <head></head> section of every page. */ -}}
<!-- Add umami analytics -->
{{ partialCached "hugomods/umami-analytics/index" . .Params.analyze }}
<!-- End umami analytics -->
{{- /* Head custom content area end */ -}}
Fixing Issues
After setting up the theme and additional features, I identified some minor issues that needed fixing.
Improving Translations
The default translations for certain UI elements weren’t great, so I manually updated them in the i18n folder.
CSS Fix for Images
Some images weren’t displaying correctly. I modified the CSS to ensure all images were properly aligned.
Create a file post-single.css in assets/css/common:
.post-content img {
    border-radius: 4px;
    margin: 1rem 0;
    max-width: 100%; /* Make sure images are not wider than the container */
    height: auto; /* Make sure images are scaled correctly */
}
Adding Custom Cards to the Homepage
I wanted to include profile cards on my homepage to display real-time data. I found an existing project:
- Lanyard Profile Readme → GitHub Repo
However, it included an Apple Music card that I didn’t need. Since the original project didn’t allow disabling it, I forked the repository, added the ability to remove Apple Music status, and hosted my own version:
- My Forked Version → GitHub Repo
That’s all for now !